
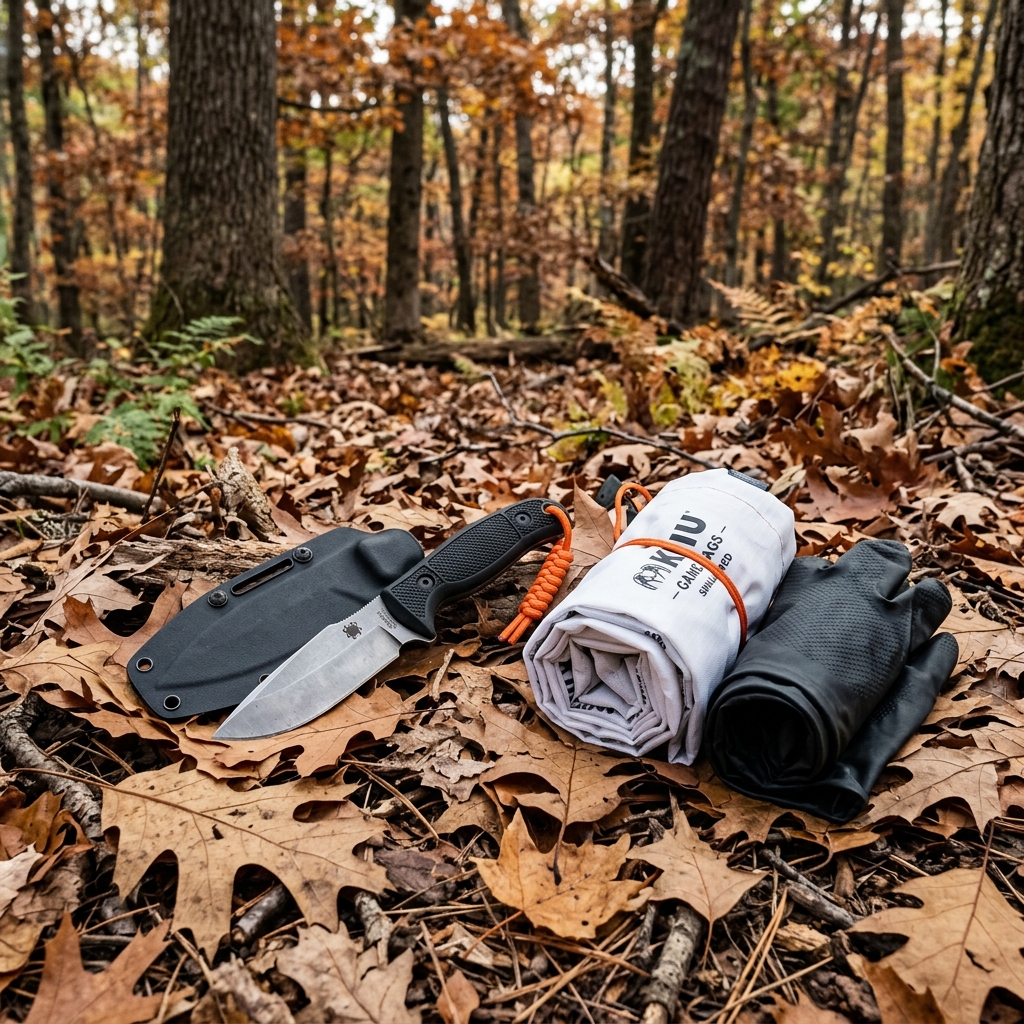
How to Pack a Hunting Kill Kit: The Backcountry Essentials
Build a 2-pound kill kit that lives in your pack: blades, game bags, gloves, tags, and trauma gear so field dressing stays safe when the buck is down.
The buck is down, hands are shaking, and daylight is gone. That is the worst moment to realize your knife is in the truck two miles away—or that your tag is buried in a forgotten jacket. A kill kit is a small waterproof pouch that stays in your pack all season with everything needed from first cut to cooled meat.
Organization beats adrenaline. Build the kit in summer, weigh it, and leave it alone except to replace blades and gloves. Tie it to clean field dressing, the gutless method for deep pack-outs, and the right knives. If the buck is a wall-hanger, add caping notes to the same pouch.
Design Goals: Light, Dry, Dedicated
Aim for under 2 pounds and one job only: processing and legal tagging. Do not mix lunch wrappers and rangefinder batteries into the same bag.
Suggested container:
- Roll-top dry bag or hard-sided small case
- Bright exterior color so you find it in leaves at night
- Internal zip pouches separating blades, gloves, and paperwork
- A carabiner loop so the kit clips inside the pack and cannot migrate to the bottom under snacks
Inventory it before every trip. Dull blades and one leftover glove from last November do not count as ready. Put a rebuild date on a piece of tape inside the lid—August is a good annual reset.
Core Implements: Blades, Saw, Bags
Primary blade
Skip oversized “survival” knives for gutting. A replaceable-blade scalpel system (Havalon, Tyto, Outdoor Edge, etc.) stays surgically sharp: when hide dulls the edge, swap blades instead of stone work in the dark. Carry 6–12 spare blades in original packaging so thin edges do not chip loose in the pouch.
Backup fixed blade
A compact 3–4 inch drop-point fixed blade backs up a snapped surgical blade and handles light cartilage better. Keep it sharp and sheathed inside the kit—not rattling loose.
Bone saw
A folding bone saw helps split pelvis or remove a skull plate. Do not torque a thin replaceable blade through bone—it will shatter into the meat or your hand.
Game bags
For quartering, pack four breathable synthetic game bags. Cotton pillowcases hold moisture and invite flies. Synthetics protect meat while allowing cooling—mandatory for gutless pack-outs. In warm weather, a fifth bag for backstraps and tenderloins is cheap insurance.
Optional: compact silicone tether or short cord for solo leg control while you work.
Bio-Safety Items
Field dressing means bacteria and zoonotic risk.
- Nitrile gloves — at least 3 pairs, thick and high-vis (blue/orange). Protect cuts from gut contents and reduce pathogen exposure.
- Scent-free wet wipes — 5–10 in a zip bag for hands, knife handles, and phone screens before they touch the pack.
- Small bottle of alcohol or sanitizer — backup when wipes run out.
- CWD zone reminder — know your local rules; avoid improvising brainstem samples.
Gloves are medical gear, not vanity. Put the first pair on before the first cut, and swap if a glove tears mid-job.
Tags, Light, and Admin
Legal mistakes spoil hunts as fast as dull knives.
- Waterproof pouch with license/tags and a Sharpie
- Heavy zip ties or tag wire for antler or tendon attachment
- Headlamp with fresh batteries plus a tiny backup light
- Phone battery pack if your state uses e-tags
- Notepad or phone note template for shot time and GPS pin (helps if you call a tracker later)
- Passport photo of your hunting license if your state accepts digital copies—still carry physical where required
In most states you must notch/attach before you move or dress the animal—know your regs cold. Keep the admin kit inside the kill pouch so you are not digging through the whole pack in the dark.
Cordage, Helpers, and Meat Logistics
- 20 feet of bright 550 paracord — tie legs, hang bags, temporary marker
- Mini carabiner
- Electrical tape wrap on a stub — emergency repairs
- Compact drag rope on bigger-deer hunts (may live outside the 2-pound pouch on the pack exterior)
- Permanent marker for labeling game bags with date and sex if you process multiple deer
If you hunt public land far from the truck, decide before the shot whether you will drag whole or quarter. Pack the kit to match that decision so you are not improvising bags you do not have.
Trauma Gear Belongs Here Too
Most field injuries are knife-related, not gunshots. Blood-slick hands plus fatigue equal slipped blades.
Include:
- Tourniquet you have trained with
- Compressed gauze / clotting gauze
- Pressure bandage
- Cloth tape
- A pair of cheap pliers for changing surgical blades with greasy hands
Cut away from your body. Slow down when tired. A kill kit without trauma supplies is incomplete. Practice applying the tourniquet once a year so it is not theoretical.
Packing Layout That Works at Night
Load in reverse order of need:
- Headlamp and gloves on top
- Tags and Sharpie next
- Knives and spare blades
- Saw and bags at the bottom
Practice opening the kit with gloves on in a dark garage once before season. Muscle memory beats panic. If you hunt with a partner, each pack should carry a complete kit—do not share one pouch across two hunters on separate stands.
Climate and Hunt-Style Variants
Warm weather: Extra gloves, more wipes, instant ice plan in the truck, urgency for spoilage. Add a trash bag for hide only if you will cape—never seal a warm cape without cooling first.
Backcountry: Full game bag set, compact sharpener if you only carry fixed blades, electrolyte packet for the pack-out, and a lightweight meat shelf plan (shade, airflow, hang).
Trophy cape hunt: A card that says “cut 6–8 inches behind shoulders” so adrenaline does not short-cape a lifetime buck.
Youth mentor hunts: Duplicate gloves and a simpler blade option the mentee can handle safely under supervision.
Pre-Season Build and Mid-Season Refresh
Treat the kill kit like a rifle zero—verify it on a calendar:
- Late July: Assemble pouch, weigh it, photograph contents for a packing list
- Two weeks before opener: Replace batteries, wipes, and any cracked blade packs
- After every deer: Restock gloves and blades the night you get home—do not wait until the next hunt
- After a warm-weather recovery: Sanitize the pouch interior; blood smell in a pack educates the next sit
Print a one-page checklist and tape it inside the dry bag lid. When adrenaline is high, you will not invent inventory from memory. If you fly to an out-of-state hunt, move knives to checked luggage and rebuild the pouch at the destination so TSA does not gut your season—see DIY out-of-state hunts for broader trip logistics.
Solo vs Partner Processing Roles
If you hunt alone, the kit must be complete. If you hunt with a partner, assign roles before the shot:
- One person controls legs and light
- One person cuts
- Both carry gloves and a headlamp
- Only one knife works inside the cavity at a time to avoid stab accidents
Talk through the plan on the ride in. The first dark, muddy recovery is the wrong time to debate who holds the flashlight. A shared plan plus two complete kits turns chaos into a 20-minute job.
Frequently Asked Questions
Should the kill kit stay in my pack year-round? During season, yes. In the off-season, pull organic wipes and batteries so they do not rot or corrode, then rebuild in late summer.
Are folding knives okay as the only blade? They work if lock strength is solid and you keep them sharp. Many hunters still prefer a fixed backup for hard use. Replaceable systems win for speed.
How many game bags for one deer? Four quarters = four bags is the standard gutless loadout. Add a fifth for trim/backstraps if you bone in the field.
Do I need a hatchet? Rarely for whitetails if you carry a bone saw. Hatchets add weight and accident potential.
What about a full first-aid kit? Carry a separate IFAK for general injuries. Kill-kit trauma items specifically cover blade accidents during processing—they can overlap but should be reachable without unpacking the whole medical kit.
How often do I replace nitrile gloves in the kit? If heat has glued them into a brick, replace the pack. Otherwise after each deer season or whenever a pair is used.
Build the pouch in July, keep it dry, and you will be calm when the real work starts in November. Organized hunters process cleaner meat—and fewer ER visits.