
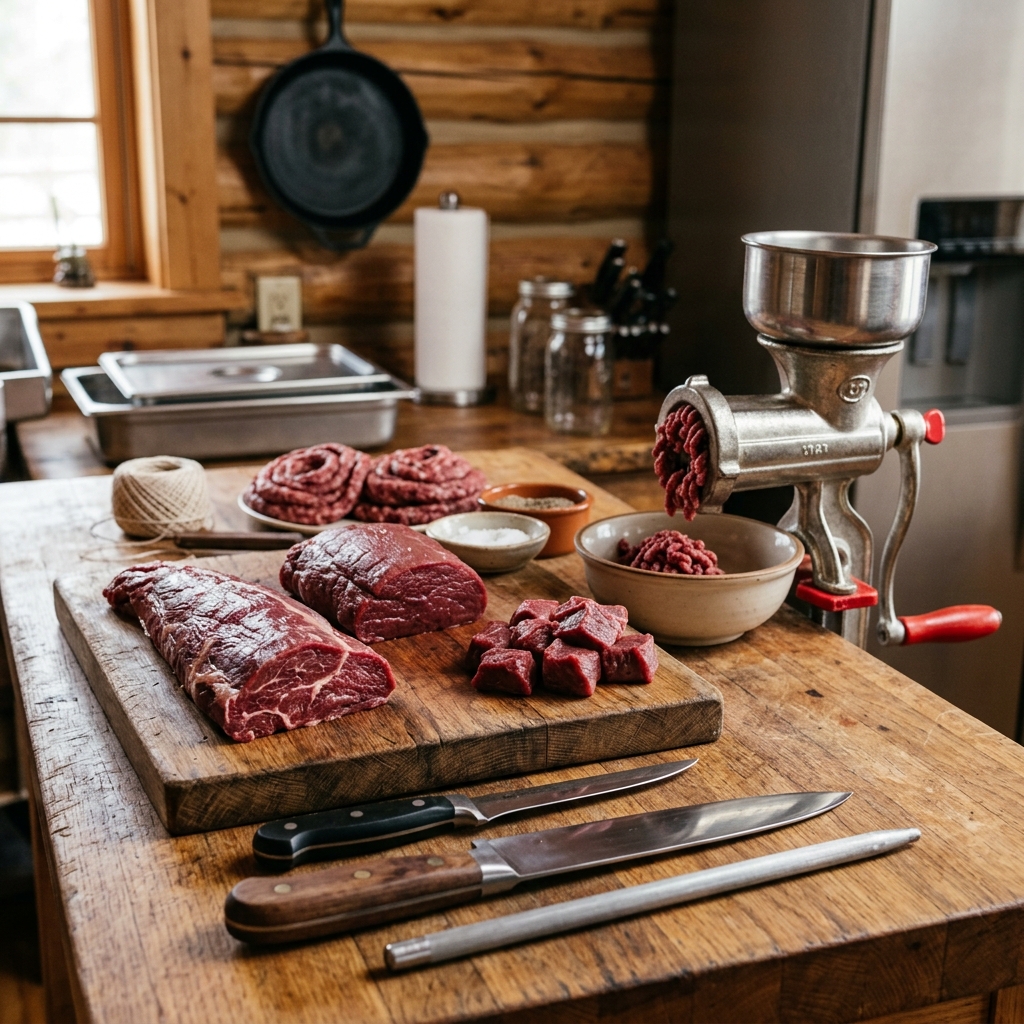
DIY Venison Processing: The Ultimate Guide to Butchering at Home
Process your own deer at home with seam butchery, aging tips, essential tools, sanitation rules, and freezer packaging that protects flavor.
Processing your own harvest closes the loop from field to freezer. You control cleanliness, cut quality, trim, and packaging. You also avoid communal grinders, bone dust from band saws, and the guesswork of wondering what happened to your meat after you dropped it off.
Home butchery looks intimidating the first time. With a cool workspace, a few dedicated knives, and seam-based breakdown, it becomes a repeatable yearly skill. This guide covers tools, aging, seam butchery by quarter, grinding and packaging, sanitation, common mistakes, and how to plan your freezer so nothing goes to waste.
Why Process Your Own Deer
Commercial processors are busy during peak season. Turnaround can stretch weeks, and high-volume shops may grind multiple animals in sequence. Doing it yourself means:
- Cleaner steaks without saw-smeared marrow on cut surfaces
- Exact trim levels (more or less fat, silver-skin removal)
- Custom packages sized for your household
- Full use of trim for burger, sausage, or stew
If you used a careful field care routine—quick cooling after the shot—you are already ahead. Pair this with solid meat spoilage limits knowledge so you never push temperature risk for convenience.
Cool Space, Timing, and Dry Aging
Keep meat at 40°F or below from the moment it is skinned and quartered until it is sealed and frozen. A spare fridge, a clean cooler with ice (meat not sitting in meltwater), or a cold garage in winter all work.
Dry aging window. If you can hold skinned quarters or a hanging carcass at 34–38°F, 7–10 days of aging lets enzymes tenderize connective tissue. You will lose some surface trim to drying—that is normal. Do not age warm meat “because the garage feels cool.” Use a thermometer.
When to skip long aging. If the animal ran hard, was gut-shot, or sat warm too long, prioritize fast cooling and earlier cutting over extended hang time. Flavor problems start in the field more often than in the butcher room.
Essential Tools (Skip the Gimmicks)
You do not need a commercial shop. You do need dedicated food tools—not only your field knife.
- Flexible 6-inch boning knife — Contours pelvis, femur, and shoulder bones without gouging.
- Stiff breaking or chef’s knife — Portioning steaks and removing large muscle groups.
- Steel or ceramic sharpener — Dull blades tear; sharp blades follow seams.
- Cutting boards — Large plastic boards you can sanitize; swap when contaminated.
- Vacuum sealer — Best defense against freezer burn for 12–24 months.
- Meat grinder (0.5 HP+ stainless preferred) — Neck, shank, and trim become burger fast.
- Scale and marker — Label weight, cut, and date on every package.
Optional but useful: butcher’s gloves for grip, apron, and a second cooler dedicated to finished packages. For field-to-truck logistics before this stage, the gutless method keeps quarters cleaner on remote hunts.
Seam Butchery: Hindquarters
A hindquarter is not one roast. Separate along silver-skin seams into top round, bottom round, eye of round, and sirloin tip.
Technique. Use fingertips or the dull spine of the knife to find white connective seams. Pull muscles apart; cut only where tissue will not release. You preserve fiber integrity and get even cooking pieces.
What each cut becomes.
- Top/bottom round — roasts, cubing steak, jerky strips
- Eye of round — medallions or thin jerky
- Sirloin tip — steaks or roast
- Shank meat — grind or slow braise after heavy silver-skin trim
Remove all silver-skin before freezing steaks. It will not melt like beef fat; it shrinks and stays chewy.
Seam Butchery: Shoulders, Loins, and Neck
Shoulders are working muscle. Separate the flat “clod” style groups you can, then decide: roast for shredding, stew cubes, or grind. Do not force shoulder into premium steaks unless the animal was young and well-finished.
Backstraps (loins). Remove as whole muscles, trim silver-skin carefully, then portion into steaks or leave as roast lengths. Avoid sawing across bone into the loin—debone cleanly.
Tenderloins. Pull early if still attached; they are tender and dry out if overcooked. Package separately.
Neck. Bone out for grind or slow cook. Neck meat is flavorful when cooked long and moist.
Work one quarter at a time. Keep the rest refrigerated so the board never becomes a warm buffet.
Grinding, Fat, and Packaging
Venison is extremely lean. Pure venison burger often crumbles and tastes dry on a grill.
Burger blend. Add roughly 10–20% beef suet or pork shoulder by weight for binding and moisture. Chill meat and fat near freezing before grinding for cleaner cuts through the plate.
Double grind option. Coarse first for stew/chili packages; fine second pass for burger if you prefer a smoother texture.
Vacuum sealing. Remove air fully, double-seal critical packages, and freeze flat for faster chill and easier stacking. Butcher paper works short-term; vacuum wins for year-long storage.
Labeling system. Include cut, weight, and date. Rotate oldest first. Keep a simple freezer inventory on your phone so you actually cook what you packed.
For finished meals, browse venison recipes and preservation projects like homemade jerky or canning venison.
Sanitation and Safety Non-Negotiables
Hands and boards. Wash with hot soapy water between quarters. Sanitize boards after any gut contamination risk.
Grinder discipline. Never push meat with fingers. Use the stomper. High-torque augers do not forgive mistakes.
Temperature. Ambient kitchen heat is the enemy. Batch small. If the room is warm, put unfinished meat back on ice every 20–30 minutes.
Knives. Dedicated food knives beat a muddy field knife. If you want gear specifics for skinning vs kitchen work, see best knives for gutting and skinning.
CWD and transport rules. Follow your state’s carcass movement laws when bringing meat home from out of state—debone and leave CNS tissue behind where required.
Common Mistakes Checklist
- Sawing randomly through muscle instead of following seams
- Leaving silver-skin on steaks
- Warm garage butchering for hours
- Overpacking vacuum bags so seals fail
- Freezing large untrimmed “mystery bricks” you will never thaw thoughtfully
- Adding no fat to burger, then blaming venison for dryness
- Using scented cleaners that leave chemical taste on boards
A Practical One-Deer Workflow
- Skin and quarter; cool immediately.
- Age 0–10 days based on temperature and animal condition.
- Debone hindquarters into seam muscles; trim; package steaks/roasts.
- Remove loins and tenderloins; package.
- Break shoulders into roast/stew/grind piles.
- Grind trim with measured fat; package flat.
- Clean tools; log freezer inventory; dispose of waste legally.
Two people can finish a deer in an afternoon once the system is familiar. Solo, plan two cooler sessions so fatigue does not create sloppy trim.
Cut Map: What to Make From Each Muscle
Having a plan before you start prevents “mystery packs” you never cook.
Premium grill/pan cuts. Backstraps and tenderloins become steaks or medallions. Keep packages thin so they thaw fast for weeknights.
Roasts. Top and bottom rounds excel as slow roasts, smoked slices, or cube steak after tenderizing. Sirloin tip can go either roast or steak depending on thickness.
Braise and shred. Shoulders and shanks love moist heat—chili, barbacoa-style tacos, stews. Leave some connective tissue for collagen breakdown, but still remove thick silver-skin sheets.
Grind pile. Neck, flank scraps, trim, and any bruised edges after cutting out bloodshot meat. Be ruthless about removing hair and debris before it hits the grinder.
Jerky and snack sticks. Eye of round and uniform round slices make consistent jerky. Keep a dedicated “jerky” tote so you do not accidentally freeze everything as steaks first.
Portion for your household. Two-person homes often prefer 0.75–1 lb steak packs and 1 lb burger packs. Large families may want 2 lb chili bricks. Consistency beats random sizes.
Field-to-Table Quality Control
Butchery cannot fix warm meat. If the deer sat too long in heat, trim aggressively, grind more into cooked dishes, and skip long aging. Note bloodshot areas from the shot and cut them out entirely—do not hide them in burger hoping spice will mask iron flavor.
Keep a separate “dog/trim” bowl only if you legally and safely use scraps that way; never mix questionable trim into human burger. When in doubt, discard.
If you travel out of state, follow CWD carcass rules before you ever reach the cutting board. Deboning at camp is often smarter than fighting warm whole quarters in a hotel bathtub.
Frequently Asked Questions
Should I cut bone-in chops? Usually no for home setups. Band-saw bone dust and waxy marrow smear flavor. Debone for cleaner steaks unless you have a purpose-built saw and accept the trade-off.
Do I need to add fat to burger? For grilling and pan burgers, yes—about 10–20%. For chili or sauce dishes, leaner grind can work because moisture comes from the recipe.
What is silver-skin and why remove it? It is tough fascia around muscles. Heat does not tenderize it. Leave it on and steaks curl and chew like rubber.
How long will vacuum-sealed venison last frozen? Quality is typically excellent 12–24 months at 0°F if sealed well. Longer storage is possible but texture slowly declines.
Can I process in a warm garage if I work fast? Risky. Keep bulk meat on ice and only pull what you will cut in the next 20 minutes. Pathogen growth loves 40–140°F.
Is aging required? No. Properly cooled young deer can eat well with little hang time. Aging improves tenderness when you can hold true refrigerator temperatures.
Honor the animal by keeping meat cold, clean, and deliberately cut. Every ounce you package well is protein you earned—and flavor you control.